Goodbye, Blackheads! This DIY Pore Strip Will Help You Get Rid Of Junk From The Pores
Those unpleasant and bumpy blackhead spots on your nose can be extremely infuriating. But not being able to get rid of those blackheads is a complete nightmare. If you have been exfoliating your face hurting with face scrubs, you need to STOP now!
Exfoliating is great, but it is not enough to pull out the junk rooted in your pores. If you are serious about getting the gunk out, a blackhead removal strip is what you need. And fret not, they are not painful as they look in YouTube beauty videos. Just because we love you so much, we're about to tell you a DIY alternative that's much gentler and faster.
 Photo from LilyVanity
Before we begin telling you, how to make your own pore strip at home, here a few things you need to be aware of.
#1 Do not use the strip more than twice a week as it can be very harsh and can also damage your healthy skin cells.
#2 Do not ever try to squeeze the dirt out, as it will only stretch the skin and make your pore appear even bigger.
#3 To achieve the best results, gently scrub your face before using the strip on your nose to bring the dirt to the surface. The pore strip will help in pulling out the dirt easily.
 Photo from Pinterest
DIY pore strip :
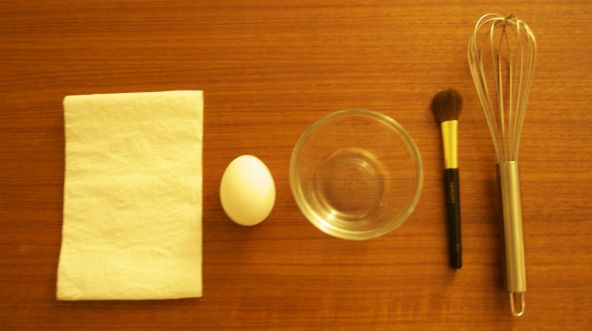
Things you need -
Egg White
Tissues cut in small rectangle shape
Face mask shape
Step 1: Whisk the white portion of one egg until it gets frothy.
Step 2: Now use the face mask brush & apply a thin layer over your nose.
Step 3: While it is still wet, place the strip of tissue over it and press down so the egg white gets absorbed.
Step 4: Now add another layer of egg white mixture and repeat another round with the tissue.
Step 5: Allow it to sit for 20-30 minutes and let it dry completely.
Step 6: Peel it off gently and notice how clean your nose looks!
Picture Credit- Pinterest, LilyVanity
Feature Image- Young Times
Text by- GirlStyle IN


